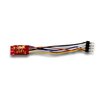
Product Support for: Mobile Decoders -> 1 Amp, Mobile Decoder, Medium DCC Plug on Short Harness, 2 Functions, Back EMF (DZ125PS)
View the Product Page for the DZ125PSTiny Decoder with 8 Pin Plug (Replaces DZ123PS)
3 Articles Found for DZ125PS
1. Carefully remove the locomotive’s shell from the frame. Notice the orientation of the shell to the frame (Figure 1) so that you can reinstall the shell correctly. 2. Remove the dummy plug from the locomotive’s DCC-ready socket. (Figure 2) The jumper plug allows the loco to operate on a standard DC track or in analog mode on a DCC track. Pin 1 is marked for proper orientation of the decoder. 3. The DZ125PS has a short, 1" harness with a DCC 8-pin plug on the end of it. The plug is oriented so the pin for the orange wire ...
Steps needed for the DZ125PS or DZ143PS decoder installation: Remove couplers and carefully remove loco shell to reveal the 8 pin dummy (DC) plug. Remove 8 pin dummy (DC) plug [picture shown with plug removed]. Plug in the DZ125PS or DZ143PS with orange wired #1 pin in pin with triangle marked pin. Detail of DZ125PS or DZ143PS with orange wired #1 pin correctly oriented. Tuck decoder in cab area of loco, replace shell and reinstall couplers.
Application Note: Con-Cor HO-Scale Zephyr steps needed for the DZ125PS decoder installation Step 1: Carefully remove the body from the frame. There are four clips along each side of the body. (See red arrows) We have found if you start at the rear of the body with a small flathead screwdriver and carefully pry the body outward to remove the back clip, you can move the screwdriver forward to release the others. Once the body is completely removed, carefully lift the light board from its holders on the bulkheads. (See blue arrows) Be very careful as the pins that hold ...
