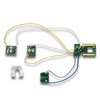
Product Support for: Mobile Decoders -> 1 Amp N Scale Mobile Decoder for Kato N RDC (DN143K2)
View the Product Page for the DN143K2For Kato N RDC.
3 Articles Found for DN143K2
Photo Courtesy Kato, USA The DN143K2 replaced the earlier DN122K2 as a custom decoder designed for the Kato RDC in N-Scale. This is not a particularly easy installation and there have been some reports of problems with the headlights. Paul Lator has some experience with this installation, and this may be of help to you: "The wiring with the DN143K2 works well if you do not route the wires over the top of the seating in the RDC, rather completely disassemble the unit, mount the decoder in it's designated location then run the wires through the drive shaft tunnels. Place ...
Photo Courtesy Kato, USA Installation Instructions: The DN143K2 cannot be tested prior to installation in the rail diesel car. 1. Carefully remove the shell from the RDC. Carefully remove the plastic casting from the bottom side of the RDC frame, using a flat bladed screwdriver to pry it loose. 2. Gently remove the white clip that holds the seat panel in place. Remove the seat panel by pushing up gently from the bottom of the frame. The seat panel has clips underneath that are very easy to break, so be careful. 3. Take extra care to notice how the RDC ...
There have been reports of headlight problems with some DN143K2 decoders; the unit will be running in one direction but the headlights are backwards. There is a simple fix for this problem. Set CV33=2 and CV34=1; this will remap the function outputs F0F and F0R.
