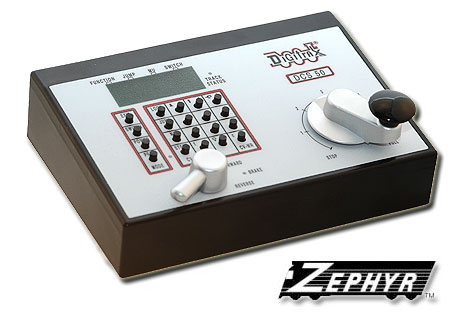
DCS50 Zephyr can control Functions F0 - F8.
Most DCC mobile decoders have function outputs that you can use to control lamps, LEDs, sound, smoke generators and other on/off devices installed in your locomotives. Most locomotives made today come with a head light and sometimes with a rear light, too. With DCC, these are controlled by the decoder’s function outputs. You can also install additional DCC controlled lighting such as cab lights, Mars lights, ditch lights, rotating beacons and others on your locos. The addition of these functions can add to the fun and realism of your locomotives.
You must have the functions installed and connected to the appropriate decoder function leads in order to use the functions. Simple decoders such as the DZ125 have only two functions, usually used to control the locomotive's headlights. Advanced decoders such as the DZ143 have four functions, others such as the DN163 have six functions.
Some newer decoders have more functions than the Zephyr can control, but you can add a DT400 throttle to access up to F12 or a DT402 throttle to access up to F28.
______________________________________________________________________________________________________________________________________________
To operate functions F0-F8 on your locomotive:
1. Select the loco you want to control with your Zephyr DCS50. On the throttle display, you will see the Function Indicator Dot illuminated to let you know that you can use the numeric keys to operate the functions.

2. Use the DCS50’s numeric/symbol key pad to turn functions on and off. For example, to turn the head light on, press the LAMP/0 key. Press the LAMP/0 key again to turn it off.
Function 0 (F0)
Press the LAMP/0 key to toggle F0 between on and off. Each time the LAMP/0 key is pressed while in function mode, Function 0, also called F0 will change from off to on or vice-versa. On locos with reversing head lamps and back up lamps, the head lamp or back up lamp in your loco will come on depending on the direction of travel of the loco. Function 0 is most often used to turn on/off the head light/back up light but can be set up for other functions as well (See your Decoder Manual for more information).
Functions 1, 4, 5, 6, 7, & 8
Press the number/symbol key on the numeric keypad that corresponds with the function number you want turn on/off. The function will toggle between on and off each time you press the number key.
The BELL/1 Key is used for Function 1 (F1) and is labeled with a BELL icon to remind you that this is the preferred function key for bell operation.
Function 2 (F2)
Press the HORN/2 key on the numeric keypad. The HORN/2 key operates Function 2 and is labeled with a whistle icon to remind you that this is the preferred function for whistle or horn operation. This key is set up as a “non-latching key” so that if a horn or whistle sound is installed in the loco, it will sound
for as long as the key is held down. This lets you vary the length of time that the horn or whistle blows, just like the prototype.
If you want Function 2 to remain on:
1. Press and hold the HORN/2 key.
2. Press and hold the EXIT key.
3. Release the HORN/2 key
4. Release the EXIT key.
Function 3 (F3)
COUPLER/3 key operates Function 3 and is labeled with a COUPLER icon to remind you that this is the preferred function key for future coupler operation. The DCS50 Zephyr treats Function 3 is a normal on/off function unless you set it up as a non-latching function like Function 2. This means that F3 can be used either as a normal function or to control a function that requires a momentary activation like some couplers.
Note: Functions 9 - 12 can be controlled when using DT400 with Zephyr, connected to LocoNet. Functions 9-28 can be controlled when using a DT402 throttle with your Zephyr connected to LocoNet.